Pages

July 30, 2008

Zucchini Cakes with Dill & Feta

Just a quick recipe...something I've had bookmarked for a while and finally tried using a large zucchini from the garden. These cakes are crunchy outside and creamy inside.

Zucchini Cakes with Dill and Feta
adapted from Nigel Slater's The Kitchen Diaries


1 large zucchini
1 medium yellow onion, finely chopped
olive oil

1 clove garlic, peeled and chopped

3 tablespoons AP flour

1 large egg, slightly beaten

4 ounces feta cheese
1 tablespoon dried dill (or small bunch of fresh)

salt & pepper
  • Grate the zucchini with a coarse grater (I used the grating disk on my food processor). Place zucchini in a colander over a bowl & sprinkle with salt. Leave it to drain for at least half an hour.
  • Heat a few tablespoons of the oil in a pan. Cook the chopped onions until soft but not brown. Dry the grated zucchini or wringe them out lightly. Add the zucchini with the garlic into the pan. Cooking until almost pale gold. Stir in the flour, cook until the flour is well-combined and well-cooked in the mixture. Season to taste with black pepper and a pinch of salt. Remove from heat and let cool to room temperature.
  • Stir in the egg, feta, and dill. Refrigerate until chilled.
  • Heat a few tablespoons of oil in a pan. Shape heaped tablespoons of the zucchini mixture into patties. Cook until golden, turning once (be delicate; the mixture is very fragile).
  • Serve with a sprinkling of parmesan cheese, tomato sauce, or your favorite chutney.

July 29, 2008

Tuesdays with Dorie: Ginger Peach Galette

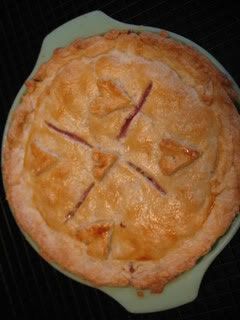
Michelle of Michelle in Colorado Springs chose the Summer Fruit Galette for this week's Tuesdays with Dorie recipe (you can find the full recipe here). Since peaches are in season around here, I chose to make a ginger peach galette with local fruit I got at the farmers' market.

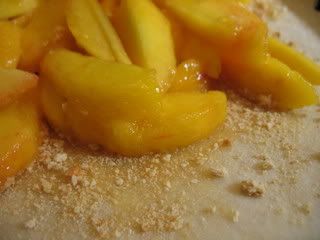
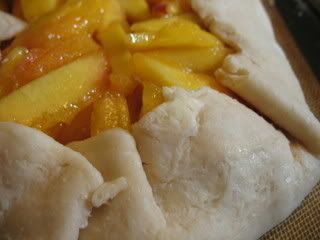
A galette, I've learned, is a rustic (and easy) pie. It involves rolling out one pie crust, spreading the crust with jam (I used The Ginger People's ginger spread), sprinkling on a layer of graham cracker crumbs (or plain breadcrumbs) to prevent the bottom from getting soggy, topping with fruit (simply peeled & sliced peaches), and folding the dough edges over. It was a piece of cake...err, umm...pie!

Photobucket

Photobucket

Photobucket

Dorie's recipe also calls for a custard filling. After the galette (which means wafer in French) baked for 20 minutes, a custard of butter, sugar, eggs, and vanilla is poured in around the fruit. The galette continues baking until the custard is set.

So, I'll admit that I was a little hesitant about the custard addition. It didn't seem to be setting, even as I cooked it much longer than called for. But then I realized that all the bubbling and jiggling was due to the juicy peaches.

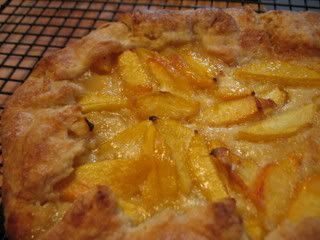
Nevertheless, I shouldn't have worried. The galette was amazing! The custard gave it a kind of peaches-n-cream vibe, the ginger provided a nice spiciness, and the bottom crust was crisp due to the crumb coating (which I will do in all pies from now on!).

I really just can't get over how easy this is! And now, I think I've finally mastered pie crust. I am completely confident whipping up a pie any ol' day.

Guess I'll have to tackle bread next....

July 28, 2008

Schmickle's Pickles

I know, I know. But with a last name like Schmickle, how could I resist?

So, I decided to make pickles for a few reasons:
1. I had a bunch of cucumbers from the garden that I needed to use.

2. Besides the spicy carrots I made earlier this month, I'd never made pickles before.

3. I was feeling particularly domestic.

And nothing makes you feel
uber domestic than pickling...what with all the big jars and whole spices and the wafting aroma of boiling vinegar.

I felt like I should be barefoot, pregnant, living at a rural route address, and married to a burly fella named Jethro. Or something. Am I stereotyping? Sorry. The whole pickling experience was just so...
country! Not that there's anything wrong with it.

I just didn't grow up in the kind of family that canned. I remember my Grandma Martin making wild blackberry jam, with the melted wax layer on top, but that's about it. And my grandparents were pretty country.

You see, pickling was a new experience for me.


Photobucket

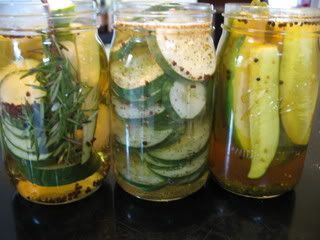
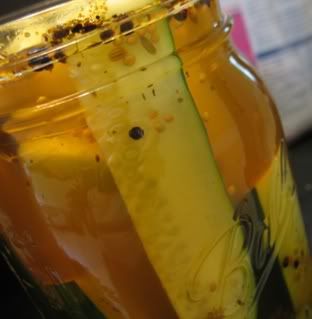
I made another batch of carrots, then three batches of cucumber pickles: bread & butter slices, sour dill spears, and rosemary garlic. The bread & butters is
Alton Brown's recipe. I sort of made up the sour pickles by improvising with the spices I had on hand, and the rosemary garlic pickles were an experiment to use up the rest of the cucumbers that wouldn't fit in the other two jars.

Photobucket

There are all "refridgerator" pickles in that they are not intended for long-term cellar storage. I didn't boil the jars and do all the proper canning techniques.

Sour Dill Pickles

Photobucket

2 medium cucumbers, cut into 8ths.
1 cup water
1 1/2 cup cider vinegar
1/2 cup sugar
2 tablespoons plus 2 teaspoons kosher salt
1 teaspoon mustard seeds
1/4 teaspoon turmeric
1 teaspoon celery seeds
1 teaspoon fennel seeds
1 teaspoon grains of paradise * (or black peppercorns)
4 whole garlic cloves, smashed
1 tablespoon dried dill (or a small bunch of fresh dill)
4 bay leaves
  • Place the cucumber, garlic, dill & bay in a large jar.
  • Combine the remaining ingredients in a non-reactive saucepan. Bring to a boil and simmer for 4 minutes.
  • Slowly pour the pickling liquid over the cucumbers, filling to the top of the jar.
  • Cool to room temperature. Top off the pickles with any remaining pickling liquid and refrigerate.


* Grains of Paradise
is also know as
or Melegueta pepper, alligator pepper, or Guinea pepper. According to The Spice House:

Grains of Paradise come from West Africa, where they grow on a leafy plant and are easily harvested. The name comes from Medieval spice traders looking for a way to inflate the price - it was claimed that these peppery seeds grew only in Eden, and had to be collected as they floated down the rivers out of paradise. Although Grains of Paradise are now rare and expensive, they used to be used as a cheaper substitute for black pepper. They have a zesty flavor reminiscent of pepper, with hints of flowers, coriander and cardamom.

Alton Brown seems to favor these for Okra, as seen on his recent show "Okraphobia", where he makes okra and tomatoes with grains of paradise. We LOVE them mixed with Tellicherry black pepper, put in a pepper grinder and then used to encrust steaks as slight variation on steak au poivre. Grind over any dish where you would normally just grind straight black pepper to add a wonderful shake-up-your-table-condiments twist!

A New York Times article written by Amanda Hesser has popularized grains of paradise. She wrote, "I put a few between my teeth and crunched. They cracked like coriander releasing a billowing aroma, and then a slowly intensifying heat, like pepper at the back of my mouth. The taste changes in a second. The heat lingered. But the spice flavor was pleasantly tempered, ripe with flavors reminiscent of jasmine, hazelnut, butter and citrus, and with the kind of oiliness you get from nuts. They were entirely different from black peppercorns and in my mind, incomparably better."

The seeds can also be chewed to aid in digestion and to warm the body.


This is my entry for
Weekend Herb Blogging, which I am hosting this week. If you would like to submit a recipe for this week's round-up, post a recipe on your blog sometime between now and August 2, then email your name, blog title, post permalink, location, and photo to me (kelly AT barbaricgulp DOT com) before August 2. I'll be posting a round-up here on the evening of the 3rd. See HERE for more guidelines.

July 27, 2008

Sher's Lentil & Spinach Patties

Sherry of What Did You Eat? passed away last Sunday. Since Sherry was a regular participant in Weekend Herb Blogging, the event's founder Kalyn postponed this week's round-up and suggested we make and post recipes from Sher's blog as a tribute to her. (You can see more tributes here.)

Though I'd only recently discovered Sherry's blog, I had already bookmarked a few of her recipes. I chose to make the lentil & spinach patties, a recipe she posted for WHB earlier this month, for lunch yesterday.

Lentil And Spinach Patties
(with just a few small adaptations)


1 cup Puy lentils
8-10 ounces spinach, stemmed and sauteed
1 tablespoon cumin
1 tablespoon dried oregano
3 tablespoons bread crumbs
salt and pepper to taste
1 egg
2 tablespoons oil
  • Cover lentils with water in a medium saucepan and boil for 2-3 minutes, then reduce the heat and simmer until tender (about 10 minutes).
  • After cooking the spinach, be sure to squeeze all the liquid out. The easiest way to do this is with a potato ricer.
  • Mix the spinach, lentils, cumin, oregano, & bread crumbs together in a bowl. Season to taste with salt and pepper. Mix in the egg and chill the mixture in the fridge for at least 30 minutes.
  • Heat the oil in a non-stick frying pan. Form the patties by forming a ball in your hand, then carefully patting it into a patty. Large, thin patties will not stay together, so make them smallish. Slip each patty into the skillet and press the patty together with a spatula if they break apart. Brown on each side over medium high heat, then carefully remove each patty to a plate.
  • Top with salsa or sauce of your choice. I topped each patty with a bit of crumbled feta cheese and a drizzle of extra-virgin olive oil.
Kelly's notes:
  • This is really good; the lentils get kind of crunchy on the outside.
  • Next time, I'll chop up the cooked spinach.
  • I used a small disher to form balls that I flattened slightly before frying. Be careful not to squish the patties while they're cooking; they'll fall apart.
  • This would have been extra tasty with chopped tomatoes or roasted red pepper sauce on top.
  • I also think the mixture would be good just cooked in a bit of olive oil (maybe with a bit of sausage or something), without being made into patties.

July 25, 2008

Chocolate Sorbet

Speaking of food blog trends...

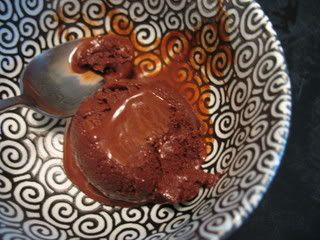
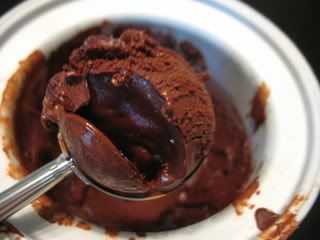
There's been a lot of buzz about chocolate sorbet lately. It must have been Smitten Kitchen's recent post about David Lebovitz's recipe from Perfect Scoop that got everyone so excited about frozen chocolate. Because, really, that's all it is...well, chocolate melted with water, sugar & cocoa powder and then frozen.

Chocolate Sorbet

Photobucket

2 1/4 cups water
1 cup sugar
3/4 cup unsweetened Dutch-process cocoa powder (I used Scharffen Berger.)
Pinch of salt (whoops, I forgot to add this!)
6 ounces bittersweet or semisweet chocolate, finely chopped
1/2 teaspoon vanilla extract

  • In a large saucepan whisk together 1 1/2 cups of the water with the sugar, cocoa powder, and salt. Bring to a boil, whisking frequently. Let it boil, continuing to whisk, for 45 seconds.
  • Remove from the heat and stir in the chocolate until it’s melted, then stir in the vanilla extract and the remaining 3/4 cup water.
  • Transfer the mixture to a blender and blend for 15 seconds (I didn't do this either; I just made sure I whisked until it was smooth. I figured a rogue chocolate chunk or two wouldn't be the end of the world.).
  • Chill the mixture thoroughly, then freeze it in your ice cream maker according to the manufacturer’s instructions. If the mixture has become too thick to pour into your machine, whisk it vigorously to thin it out.
Whoa! For having no cream or eggs, this sorbet is unbelievably rich! I agree with Peabody: "This stuff is better than brownies. It’s awesomer than the fudgiest chocolate ice cream. It makes chocolate truffles taste like they’re not trying hard enough. It could send that brandied ganache home with its tail between its legs."

A couple suggestions:
  • Since I never have room in the fridge to chill ice creams before churning, I simply fill my sink with some ice water and set the pan (or bowl) in it to cool. In this case, I took the pan right off the stove into the sink.
  • Even after churning in the ice cream maker for 1/2 an hour, the sorbet was pretty soft. So, I just put the whole canister in the freezer. It's firmer after freezing overnight, but still easy to scoop out.
  • The cocoa powder and chocolate are the key ingredients, so don't skimp on cheap shit (that means NO Hershey's!). Really. Buck up a few extra dollars for the good stuff. (Kitchen Conservatory in St. Louis sells the cocoa powder for $8.95 and Callebaut chocolate at $6.95 a pound.)

Photobucket


July 23, 2008

Quinoa: How to Pronounce It, Cook It, & Eat It

As a food blog browser, it's easy to notice foodie trends...because everyone is writing about them! Take quinoa for instance. I'd never heard of it before. It's only been in the past few months that I've noticed quinoa recipes popping up all over the world of food blogs.

Of course, since I'd never cooked or eaten quinoa, I immediately put in on my list of "things to try."

First, there is the issue of pronunciation. I had been saying it like "kwin-OH-ah." Come to find out, it's pronounced like "KEEN-wah."

Then, there is the question of classification. What is quinoa exactly? According to Cookthink: Quinoa is a seed that, if not harvested, will sprout a leafy vegetable. While the leaves can be eaten, quinoa is primarily grown for the seeds. A "pseudo cereal" native to the Andes, quinoa is mild and slightly nutty, with a beautiful, pillowy texture that's a little like couscous. [...]

Gluten-free, and easy to digest, quinoa has all the goods that grains and seeds are supposed to have (dietary fiber and so on). The real kicker though? Quinoa has the highest protein levels (up to 20%) of all the cereals -- pseudo or otherwise.

Photobucket
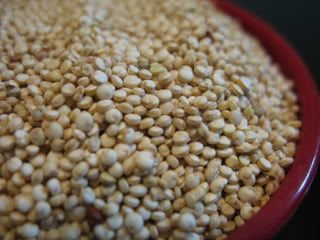
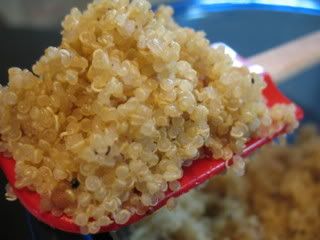
Quinoa is tiny; it reminds me of sesame seeds.
This is only a 1/2 cup measuring cup full.

How to Cook Quinoa


Ingredients:
1/2 cup quinoa

3/4 cup water

1/8 teaspoon salt

1/8 teaspoon black pepper


*Note: Most recipes call for rinsing & draining the quinoa, but I found it to be pretty difficult to do without a very fine mesh strainer. Even then, the quinoa seeds are so tiny...I ended up just making a mess trying to get the wet seeds from the strainer into a pan. So, I started over and didn't rinse. It turned out fine. I would just pick over the quinoa to make sure there isn't anything unappetizer lurking about.

Directions:
  • In a medium saucepan, combine all the ingredients. Bring to a boil, then cover and reduce to a simmer.
  • Simmer for about 12 minutes, or the water has been absorbed and the quinoa has puffed, become translucent, and opened (you'll see the curly-q inside).
  • Remove the pot from the heat and let rest, covered, for about 5 minutes.
  • Fluff the quinoa with a fork before serving.
Photobucket

At this point, I mixed the cooked quinoa with eggplant cubes that I had sauteed in olive oil & garlic, tiny orange tomatoes, sliced Kalamata olives, feta cheese, & a lemon vinaigrette. You could mix in a variety of veggies or dressings, but I also thought the grain tasted pretty darn good on its own. It has a slightly nutty taste and a satisfying little crunchy texture. It's more flavorful than couscous and rice. I am anxious to try quinoa for breakfast, prepared like oatmeal with fruit and nuts on top.

For more sweet & savory quinoa recipes, see Heidi Swanson's 101 Cookbooks.

July 22, 2008

Blackberry Sorbet On A Hot Summer Day

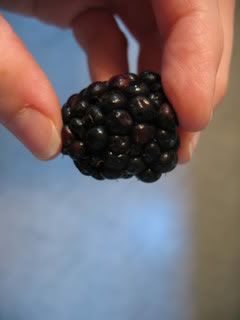
I bought a quart of gorgeous, huge blackberries at the farmers' market on Saturday. Even at $7.50, I couldn't resist them.

Photobucket

But then came the decision of what to do with those gorgeous, huge blackberries. I considered cobbler (this week's Tuesdays with Dorie recipe), a white chocolate pie, & cheesecake. But, the weather the past few days has been too hot to bake.

It's that infamous mid-western heat wave...a muggy, humid, sticky kind of hot that makes it hard to breathe outside. It seems even more stifling because we've had a fairly mild summer so far. It JUST got hot, and now it's too hot to cook, to clean, or to move off the couch...because my upstairs AC (the only central air in this big, old house) is running overtime and barely keeping up. Therefore, not only is it unbearably hot outside, but it's also pretty dang uncomfortable inside, too.

So last night I used the gorgeous, huge blackberries to make a cooling sorbet...an easy recipe that only requires a few pulses on the food processor, a quick strain, and then some spoon lifts.

Blackberry Sorbet
adapted from Perfect Scoop

Photobucket

4 cups blackberries (fresh or frozen but thawed)
1 cup water
1/3 cup sugar (I reduced it from 2/3 because my berries were particularly sweet)
2 teaspoons freshly squeezed lemon juice
  • Puree the blackberries, water, & sugar in a food processor or blender. Press the mixture through a strainer to remove the seeds. Stir in the lemon juice.
  • Pour the mixture in an ice cream maker and chill according to the manufacturer's instructions. (I have the Cuisinart 1-1/2-Quart Automatic Ice Cream Maker, and it took about 20 minutes for the mixture to freeze into a thick, luscious dessert.)

Photobucket


Weekend Herb Blogging Update

Weekend Herb Blogging has been suspended for this week as a tribute to Sher of What Did You Eat?, who passed away on Sunday (see here for more information). Kalyn suggests that people who wish to honor Sher's memory do so by posting one of her recipes or a post sharing memories of her on Sunday, July 27 (in lieu of this week's round-up).

Please send me your links to WHB posts between now and August 2. I will post the round up on August 3.

I have the pleasure of hosting the Weekend Herb Blogging event next week (July 28-August 3).

Never heard of Weekend Herb Blogging? It's a event created by Kalyn of Kalyn's Kitchen in which "bloggers around the world photograph and write about herbs, plants, veggies, or flowers, and on the weekend, we publish a Recap with links to all the posts."

Entries should be "limited to recipes or informative posts where people can learn about cooking with herbs or unusual plant ingredients."

Here are the (new) rules:

1. Entries submitted for Weekend Herb Blogging need to be posts written during that week specifically for Weekend Herb Blogging and that post cannot be entered in any other food blog event. (The only exception to this rule would be instances where a photo used in a WHB post is submitted to a photo event.) To keep the event manageable, each participant is limited to one entry per week, and entries cannot contain more than one recipe.

2. Weekend Herb Blogging entries should have the goal of helping people learn about cooking with herbs or unusual plant ingredients. With this in mind, only two types of entries will be accepted: a) Recipe posts where an herb or unusual plant ingredient is one of the primary ingredients in the recipe, or b) Informative posts that spotlight one herb or unusual plant ingredient, particularly including information about how it is used in cooking.

3. Entries must contain the words "Weekend Herb Blogging" with a link to the host for that week (that's me! So, please link to my blog Sounding My Barbaric Gulp!) as well as a link to Kalyn's Kitchen.

4. Entries can be written any time during the week, but should be submitted to the host for that week by 3:00 P.M. on Sunday. (This is based on Utah time, enter Salt Lake City into this map to calculate the difference where you are.) At the discretion of the host, posts submitted too late will be referred to the host for the following week.

5. Please put WHB in the subject line of your e-mail to identify it for the host. Your e-mail to the host should include:
  • your name
  • blog title
  • your WHB post permalink
  • your location
  • a photo attached to the e-mail.

For more information about WHB, check out Kalyn's FAQ page & Weekly Recap Archives.

SO...if you'd like to participate in the WHB event next week, you should post a recipe on your blog sometime between now and August 2, then email the above info to me (kelly AT barbaricgulp DOT com) before August 2. I'll be posting a round-up here on the evening of the 3rd.

Happy cooking!


July 15, 2008

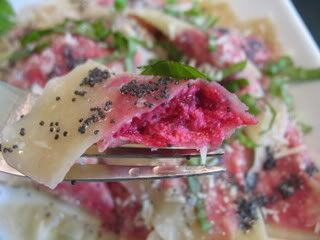
Beet Ravioli with Poppy Seed Butter & Basil

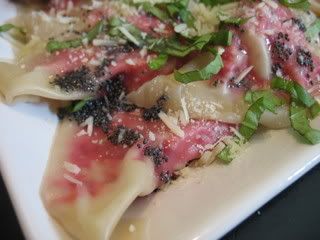
This is kind of a funky looking dish...white and red pillows with flecks of black seeds and green leaves. But, my oh my, is it delicious! And so easy! I whipped up a batch between classes for dinner yesterday, and I am planning to make more for dinner tonight!

I used four small, garden-fresh beets & basil that I got from the farmers market. I bought a bunch of basil a week ago Saturday, and it's still very fresh! I simply trimmed the ends of the basil when I got home and set the bunch in a tall glass of water. I leave the basil on the counter, not in the fridge. I change the water every couple of days, and the basil is still fresh & green!


Beet Ravioli with Poppy Seed Butter & Basil

adapted from Bon Appetit

Photobucket

2 large (or four small) red beets, rinsed clean
1/2 cup whole-milk ricotta cheese
2 tablespoons dried breadcrumbs
20 wonton wrappers
salt & pepper
1/4 teaspoon dried thyme
1 garlic clove, crushed
1/4 cup (1/2 stick) butter
1 teaspoon poppy seeds
shredded Parmesan cheese (about 1/4 cup)
fresh basil (about 6 leaves)

Preheat oven to 400°F. Wrap beets individually in foil; place on baking sheet. Roast until tender when pierced with knife, about 45 minutes to 1 hour (depending on the size of your beets). Open foil carefully (steam will escape). Cool for about 15 minutes. Peel beets; finely grate into medium bowl.

Photobucket
Add ricotta cheese. Stir in breadcrumbs, thyme, & garlic. Season to taste with salt & pepper.
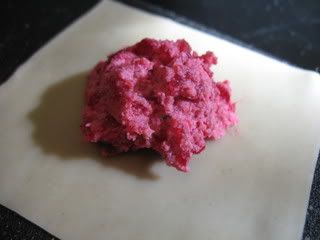
Place 8 wonton wrappers on work surface, keeping remaining wrappers covered with plastic or a damp towel. Place small bowl of water next to work surface. Spoon 1 teaspoon beet filling onto middle of each wrapper.

Photobucket
Dip fingertip into water and dampen edges of wrapper. Fold dough into a triangle over filling, pushing out as much air as possible and pressing edges firmly to seal (I used a fork to crimp the edges). Be careful, though, to not pierce to wrapper...you don't want the filling leaking out during boiling! NOTE: Ravioli can be prepared 1 week ahead. Transfer to rimmed baking sheet and place in freezer until frozen solid, about 6 hours. Transfer ravioli to resealable plastic bags.
Photobucket
Melt butter in small skillet over medium heat and stir in poppy seeds; keep warm.
Working in batches, cook ravioli in large pot of boiling salted water until cooked through, stirring often, about 2 minutes. Using slotted spoon, transfer to a serving platter. Top with melted butter sauce, parmesan, and shredded basil.

Photobucket


I'm submitting this recipe to Archana's Kitchen for this week's edition of Weekend Herb Blogging. Speaking of...I'm actually hosting WHB next week (details soon!).

July 14, 2008

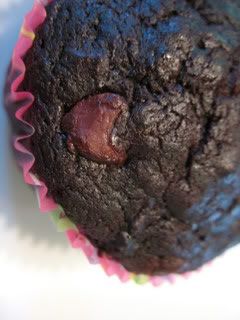
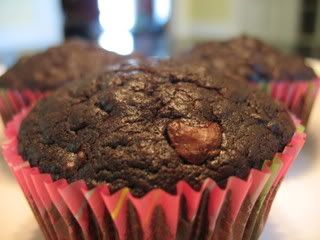
Chocolate Zucchini Bribe Muffins

Last week, I challenged the Writing Camp students I teach to see which of my two groups could write the most words on one project. It was really just an excuse to bake over the weekend. You see, I promised the winning group I'd bring them "treats" today. Their bribe...err, I mean prize was...

Chocolate Zucchini Muffins

Photobucket

1 1/2 cups light brown sugar
1/4 cup (1/2 stick) butter, melted
3/4 cup vegetable oil or coconut oil
3 large eggs
1 tsp vanilla extract
1/2 cup buttermilk
2 cups grated zucchini
1 cup chocolate chips
2 cups all-purpose flour
1 cup cocoa, sifted
1/2 tsp salt
2 tsp baking soda
1 tsp ground allspice
1 1/2 tsp cinnamon
  • Pre-heat oven to 350 degrees F. Line muffin pan with muffin cups.
  • In a medium bowl mix together the sugar, butter and oil. Beat in eggs, one at a time until well Incorporated. Stir in vanilla, buttermilk, zucchini and chocolate chips.
  • In a separate bowl mix together all of the dry ingredients. Add the liquid ingredients and mix until well combined.
  • Spoon batter into large muffin pans. Bake in the center of the oven for about 30 minutes. Cool on a wire rack. (Note: Heidi says, "Don't overcook them or you will lose all the moist goodness.")
Photobucket

July 10, 2008

Friday Favorites VII

I love Etsy. Are you familar with it? It's a place to buy handmade things. Here are some of the things I'm crushing on lately:


Etsy
Buy Handmade
See more of my favorites HERE


Tuna Melt Panzanella

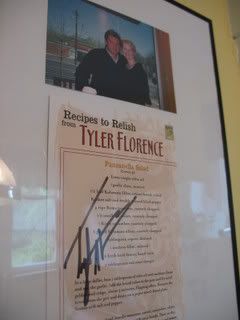
So, I've never made panzanella...until Tuesday, that is. And, I even have a framed panzanella recipe hanging in my kitchen!

Photobucket
Yeah, that's me with Tyler Florence
(I was apparently in a soccer mom look-a-like phase, yikes).
Panzanella is a Tuscan bread salad that typically consists of day-old bread cubes, tomatoes, cucumbers, red onions, and a vinaigrette.

I've been eating lots of raw veggies lately and was looking for something a bit more substantial than the traditional panzanella recipe. So, I made up my own...inspired by a tuna melt sandwich (which I had been craving).

Tuna Melt Panzanella

For the bread cubes:

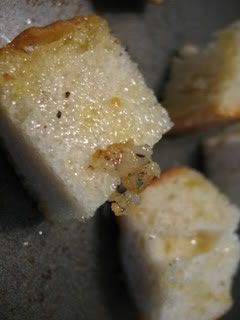
2 cup day-old bread cubes (I used a baguette)
2-3 tablespoons extra virgin olive oil
1 garlic clove, crushed
salt & pepper
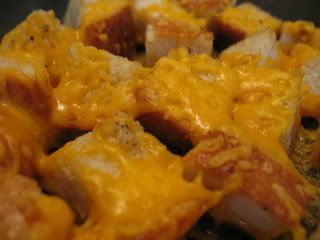
1/2 cup shredded cheddar cheese (I used sharp cheddar)

Photobucket

Toss the bread with with the oil, garlic, salt & pepper. Arrange in a single layer on a baking sheet & top with the shredded cheese. Bake at 350 for about 5 minutes, or until the cheese is melted. Remove from oven.

Photobucket


For the salad:

1 can good quality tuna (I used an Italian brand of white albacore packed in olive oil)
1/2 small white onion, diced
1 stalk celery, diced
1 cup grape or cherry tomatoes, halved
1 tablespoon capers
1/8 teaspoon black pepper
2 tablespoons fresh parsley, chopped
1 tablespoon mayonnaise
1 hard boiled egg, peeled & sliced

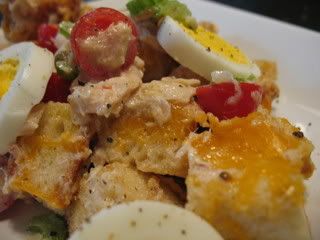
Mix all ingredients in a large bowl. Add bread cubes. Toss with vinaigrette:

3 tablespoons white wine vinegar
1 tablespoon dijon mustard
1/2 cup extra virgin olive oil
salt & pepper

Whisk vinegar & mustard in a small bowl. Slowly drizzle in olive oil while whisking. Season with salt & pepper.

Photobucket

I finished the salad last night after class, and it was even better the next day. The bread cubes soaked up the flavors but were still crunchy!

July 9, 2008

Salume Beddu

So, I have a new obsession...artisan salumi and salsiccia.

You see, I already have a weakness for cured meats (mmm...bacon). Then, in May I read an article in The St. Louis Post Dispatch about Mark Sanfilippo, philosophy major turned screenwriter (I totally want to read the Varsity Demon Cheerleader script!), turned pizza-maker (at one of Mario Batali's restaurants), turned charcuterie expert.

Photobucket
photo from The Post Dispatch

Mark recently started Salume Beddu, a company in which he offers "artisan salumi in a traditional Italian fashion (Salumi is the Italian term that encompasses all salted and cured pork products), fresh Italian Salsiccia (sausages) and seasonal Italian specialty items." He is currently selling his products at the Tower Grove Farmers' Market in St. Louis.

So far, I've tried the Salsiccia Fiama, "a spicy fresh sausage with notes of fennel, pepper, and smoked Spanish paprika" and the Soppressata Siciliano, "a rustic salame with red chile, garlic, toasted fennel and red wine."

Photobucket

I cooked the spicy Italian sausage by browning it it a skillet over low heat with a bit of olive oil, as Mark suggests. I then cut it into bite-sized pieces and ate it (with my fingers) with cheeses, fruit, bread, and wine. This sausage has quite a kick, spicy indeed...but very tasty.

Photobucket

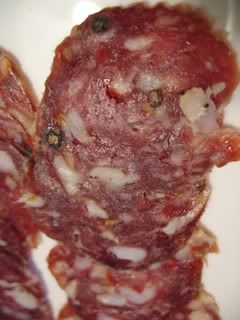
The salumi was offered sliced thin. Though not spicy like the sausages, it also had good flavor. It was a tasty addition to the cheese & fruit platter as well.

I'm just so excited to be able to purchase these artisan meats. It's nice to know that they are made with fresh, local ingredients. I'm looking forward to trying the different kinds of salumi as they become available throughout the year (see the Salume Beddu website for details).

Oh, and, Mark will be teaching a cooking class at Kitchen Conservatory on November 8. It will be a hand-on class on how to cook with sausage, including making pasta sauces. Can't wait!

July 8, 2008

I made cherry pie!

I had another "I made!" moment on Sunday. They occur whenever I make something I thought would be particularly difficult or something that I have finally mastered after a few failures. So far, there have been the I made bread! moment, the I made marshmallows! moment, and the I made ice cream! moment.

Yesterday was the I made pie! moment.

Photobucket

I've tried to make pie before, with a few mishaps...too goopy filling & store-bought crust, then too crunchy filling with a soggy bottom crust. So, I was both excited and anxious about this week's Tuesdays with Dorie recipe...Double Crusted Blueberry Pie (chosen by Amy of South in Your Mouth).

Dorie's crust recipe calls for both butter and shortening (I cut them into the flour by hand this time, instead of using a food processor as Dorie suggests). She then sprinkles breadcrumbs (I used graham cracker crumbs) over the bottom crust to soak up juices and prevent the bottom of the pie from becoming soggy.

This was, by far, the best pie I've made! It was very much a Eureka! moment. Not only did the pie look good, it tasted great...the crust was tender and flaky (you can get the crust recipe & blueberry filling recipe on Amy's blog).

Photobucket

I filled my crust with sour cherries instead of blueberries, because I had a couple pounds of fresh cherries in my fridge...and because blueberries are so expensive right now! I made the filling a little on the tart side, because I don't like it very sweet. If you want it sweeter, you could add a full cup of sugar.

Sour Cherry Pie Filling

Photobucket


4 cups sour cherries, pitted
3/4 cup sugar
3 tablespoons cornstarch
1/4 teaspoon salt

Whisk sugar, cornstarch, and salt together. Sprinkle over cherries & mix together.

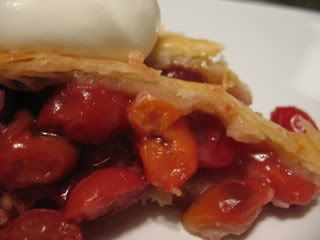
I topped the pie with hand-whipped cream. I ate two slices last night, one yesterday for breakfast, and one last night as an after-class treat. And now there's none left. *sniff*

Photobucket

July 7, 2008

Tilapia with Cherry Salsa

I have...well, had...sour cherries coming out the ying-yang since I bought some at the farmers market and Jerad's dad gave me several pounds from their tree. I've made cherry braid, cherry pie (posting on Tuesday!), and for dinner last night...

Tilapia with Cherry Salsa

Photobucket
recipe from Everyday Food

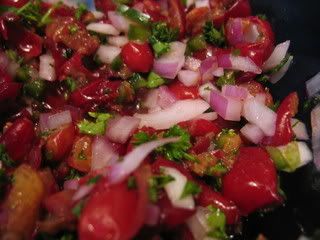
The recipe calls for bing cherries, but I used sour cherries and added about a teaspoon of sugar. It was still pretty sour, especially with the added lime juice, so I added a few squirts of light agave nectar as well. If you're not using bing cherries, I suggest you sweeten and taste as desired. In the end, this was really good...refreshing and fresh and pretty! I plan to use the leftover salsa on grilled chicken.

Ingredients


1 tablespoon olive oil
1/2 pound (2 cups) Bing cherries, pitted and coarsely chopped
1/2 small red onion, finely chopped
1/2 cup fresh cilantro (or parsley), chopped
1 jalapeno, minced
1 tablespoon fresh lime juice
Coarse salt and pepper
1/2 teaspoon coriander
4 tilapia fillets – 4 to 6 ounces each

Directions
  • In a medium bowl, combine cherries, onion, cilantro, jalapeno and lime juice. Season with salt and pepper and toss to combine. Set salsa aside.
Photobucket
  • In a small bowl, stir together coriander, 1 teaspoon salt and 1/4 teaspoon pepper. Rub tilapia all over with oil; sprinkle with spice mixture.
  • Grill or saute tilapia until opaque around the edges and underside loosens easily from grill or pan, 2-3 minutes. Using a metal spatula with a thin blade, flip fish; continue to cook until opaque throughout about 2-3 minutes. Serve topped with salsa.

July 6, 2008

Using Mesquite Flour

Charles Perry, of the Los Angeles Times, writes: It had a beautiful aroma. There was something roasted, like coffee or chocolate, then a stronger smell suggesting some fruit (perhaps dried cherries -- or was that coconut?) together with a note of spice: cinnamon, maybe nutmeg.

He is talking about mesquite flour.

I saw a small bag of mesquite flour in the back office at work last Monday, and I asked what it was for. Kirstin, the manager, said that a sales rep left it for someone to try. I mentioned that I had seen a cookie recipe using mesquite flour, and she said I could take the sample home to play with...then let her know if I thought the store should start selling it.

An assignment!

I had only ever heard of mesquite flour from Heidi Swanson's cookbook Super Natural Cooking.. Like most people, when I hear mesquite I think of smoky barbeques. So, I thought Heidi's mesquite chocolate chip cookies would have a smoky background, which didn't sound too bad to me. However, I was wrong about mesquite flour.

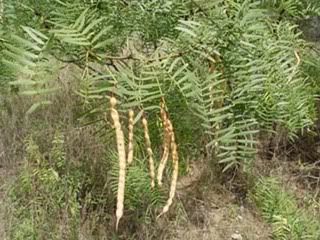
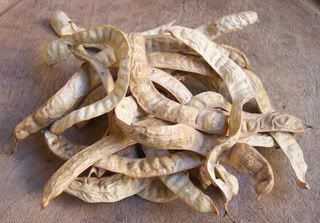
Through research, I learned that the mesquite we burn in our grills comes from the bark of the mesquite tree. Flour is made from grinding the pods of the tree, which grows in desert regions throughout the world.

Photobucket
photo from the National Park Service

Photobucket
photo from SpiceLines

According to Liz DeCleene, "mesquite is highly effective in balancing blood sugar. The natural sweetness in the pods comes from fructose. Fructose does not require insulin to be metabolized, making it safe for diabetics. The high rate of dietary fiber (pods are 25% fiber) causes the nutrients in mesquite to be absorbed slowly, preventing the spikes and valleys in blood sugar. With a glycemic index of 25, mesquire requires a longer time to digest then many grains. The digestive time for mesquite is 4 to 6 hours, unlike wheat which digests in 1 to 2 hours. These factors result in a food that maintains a constant blood sugar for a sustained time and as a result prevents hunger. [...] Further, this food delivers a big hit of nutritional value. It is high in dietary fiber and protein including lysine. The ground pods are between 11% and 17% protein. Mesquite is also a good source of calcium, magnesium, potassium, iron, and zinc." It is gluten-free and low in carbohydrates & fat, too!

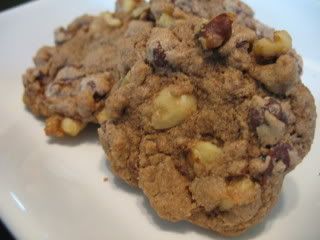
Mesquite flour is kind of sweet, kind of chocolately, kind of nutty, kind of cinnamony, kind of nutmegy, kind of...well...hard to explain. It's used not as a flour exactly, but more of a seasoning; though, it can be substituted for part of the flour in a recipe. A little bit of the stuff goes a long way.

Apparently, mesquite flour is difficult to find but highly sought after. David Lebovitz couldn't find it in Paris, and when he eventually bought some in Texas, the cashier exclaimed, "Oh! I bet you're going to make those chocolate chip cookies!"

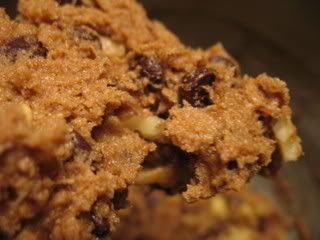
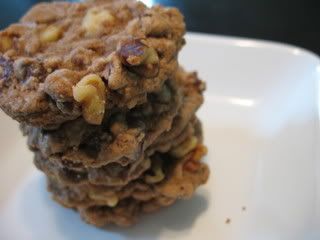
Mesquite Chocolate Chip Cookies
adapted from Heidi Swanson's recipe

Photobucket

Ingredients
1 1/4 cups whole-wheat pastry flour
1/2 cup mesquite flour, sifted if clumpy
1/2 teaspoon baking soda
1/2 teaspoon baking powder
1/4 teaspoon salt
1/2 cup unsalted butter, room temperature
1 cup sugar
2 large eggs
1/2 tablespoon vanilla extract
1 1/4 cups semisweet chocolate chips
1/2 cup chopped walnuts

Directions
  • Preheat oven to 375.
  • Whisk together the flours, baking soda, baking powder, and salt in a bowl. Set aside.
  • In a large bowl, beat the butter until light and fluffy. Beat in sugar until thick.
  • Beat in the eggs one at a time, scraping down the sides in between.
  • Add the dry ingredients 1/3 at a time.
  • Stir in the chocolate chips and nuts.
Photobucket
  • Drop by tablespoons onto baking sheets covered with parchment or silicone mat. Bake for about 10 minutes until golden brown on top and bottom. Heidi warns, "Don't overbake these; if anything, underbake them."
  • Cool in wire racks.
Makes about 2 dozen.

Photobucket

Here's how else you can use mesquite flour:
  • Add 1 teaspoon to 1 stick of softened butter to spread on toast, muffins, scones, or baked sweet potatoes.
  • Add 1/2 tablespoon to banana, strawberry, raspberry, or peach smoothies (will help prevent mid-morning hunger!)
  • Sprinkle 1/4 teaspoon on oatmeal.
  • Add to pancake, muffin, cake, and cornbread batter.
  • Add to rub seasoning mixes and breading.
  • Use to season chicken, pork, beef, seafood, stir-fries, & soups.
  • Make mesquite ice cream.
  • Add to salad dressing.
Other mesquite flour recipes:
Basic yellow mesquite cake
Skillet cornbread
Citrus mesquite spareribs
Mesquite almond shrimp
Mesquite flour tortillas
Mesquite brownies & other cookie recipes
Mesquite sugar cookies
Snack bars
Mesquite apple nut muffins & oatmeal raisin cookies
Pancakes, zucchini bread, banana bread, flan, and more!
More recipes

July 4, 2008

Firecrackers You Can Eat

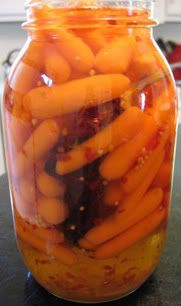
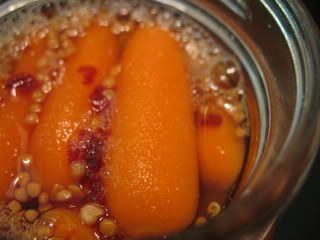
I'm just not a flag cake kind of gal. That's way too...Betty Crocker for me. Instead, I made "firecrackers"--spicy pickled carrots--for the Fourth.

Photobucket

Ingredients
1 pound baby carrots
1 cup water
1 cup sugar
1 1/2 cup apple cider vinegar
1 teaspoon onion powder
1/2 teaspoon mustard seeds
1 1/2 teaspoons kosher salt
1 teaspoon red pepper flakes
2 large dried Mexican chile

Directions
  • Place the dried chile and carrots in a large canning jar.
  • Boil the water, sugar, vinegar, onion powder, mustard seeds, salt, & red pepper flakes in a small saucepan for 4 minutes.
  • Pour the liquid over the carrots, filling to the top.
  • Cool at room temperature before sealing. Then, store in the refridgerator for 2 days before eating.
  • Will keep for about 1 week.
Photobucket

adapted from Alton Brown

Check out my fireworks feast from last year for more Fourth of July picnic-friendly foods!