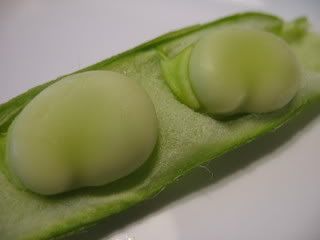
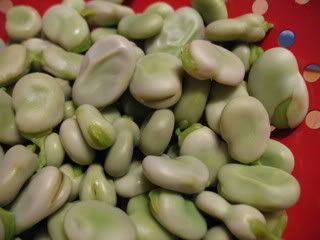
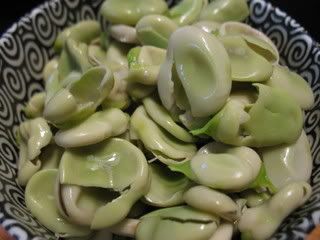
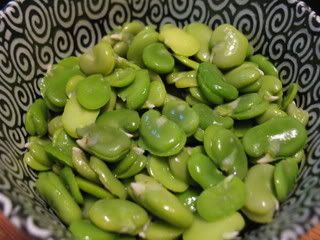
May 29, 2008

A Fiasco in the Kitchen

At work one day a couple weeks ago, Anne comes up to me and asks: "Have you ever heard of a fiasco?"

"Um, literally or metaphorically?" I replied.

"Literally, a fiasco in the kitchen," Anne said.

Images of stove fires, out-of-control countertop appliances, knife accidents, and smoke-billowing ovens flashed through my head.

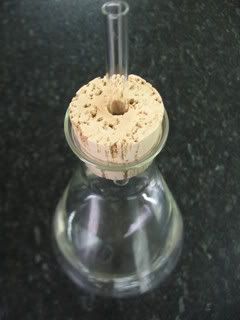
Anne explained that a fiasco, which is Italian for "flask," is the name of a Tuscan bean cooker. She's just been given one as a gift and suggested that we try it out one day soon.

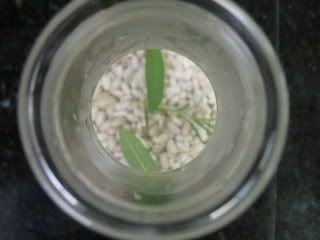
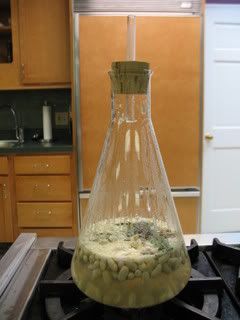
A fiasco is a large glass flask, very similar to the kind you'd find in chemistry class, with a cork top that has a glass tube running through it. It was originally designed for use in a hearth fire; cooks would put a fiasco of beans on the embers at night, and they would be ready to eat in the morning.

Photobucket

The name, however, apparently has double-meaning. Those glass beakers have been known to break on the stove a time or two. During her research online, Anne came across one man who said he was on his third fiasco. "This could be fun," I thought. And, I made sure to bring my camera to work just in case we had a fiasco of our own.

The directions were pretty vague...and in Italian. We were to put the beans with water, olive oil, basil, rosemary, garlic, salt & pepper into the flask, then cook it for 40-50 minutes. So, that's what we did.

Photobucket

Photobucket

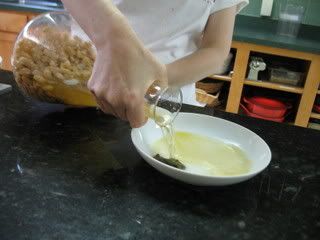
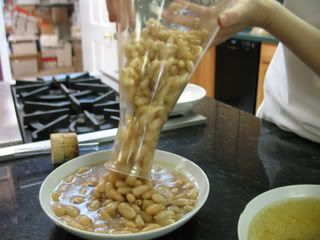
There was some concern as to how we were going to get the beans, without all the cooking liquid, out of the flask. Anne ended up pouring the water into one bowl and the beans in another.

Photobucket

Photobucket

[un]Fortunately, no fiasco took place in the kitchen that day. We had to wonder, though, were beans cooked this way any better than if they'd just been cooked in a pot? We didn't think so.

Photobucket

I think the fiasco is just a reminder of the traditional Tuscan way of bean cooking...and a more attractive way to cook beans. I mean, if you have to have a pot of beans cooking on the stove for an hour or two, it might as well be done in a pretty vessel.

Enter my domain...

So, I bit the $10 bullet and purchased my own domain name. My blog is now available at http://www.barbaricgulp.com. While Blogger should redirect everyone to that address, please make a note of the new url just in case.

You can also now send emails to kelly AT barbaricgulp DOT com.

May 23, 2008

A Sneak Peek of The Stable

Photobucket

My good friends Sara & Jesse Jones (owners of The Rotten Apple in Grafton, Illinois) are opening a brewpub in St. Louis. It's called The Stable because it's housed in the Lemp Mansion's former stables at the corner of Lemp & Cherokee in South St. Louis.

Photobucket
Sara & Jesse

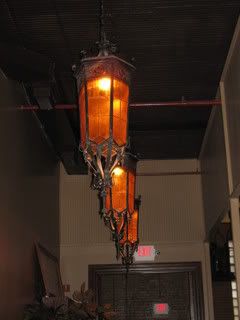
The building is gorgeous and features antique fixtures. The huge floor-to-ceiling fireplace mantel was salvaged from a train station in Joplin, Missouri, and the bar--the hulk of a bar--was originally built by the Anheuser-Busch cabinet factory (back when the brewery could do those sorts of things for bar owners) and came from a building further down on Cherokee Street. The wrough-iron light fixtures in the entryway came from a chateau in France.

Photobucket

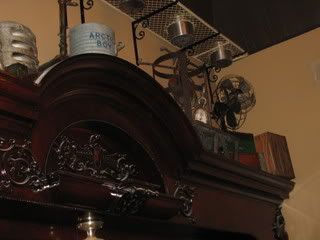
While the building no longer looks like a stable, the decor is somewhat reminiscent of such. The walls are painted dark brown and various antiques, mostly wood items, line the shelves at the top of the walls. The lighting is low and creates a cozy, comfortable atmosphere.

Photobucket
Detail of the bar & decorations

The Stable will offer house-brewed lagers and house-distilled spirits including gin, rum, moonshine, grappa, and absinthe. I got to try the grappa and absinthe on Saturday. The grappa is made from Missouri Norton grapes. I'd never had grappa before, and I didn't expect it to be so...harsh. By that I mean that it tastes like hard alcohol...and I, for some reason, expected it to taste like sweet wine. Nonetheless, I could still taste the grape in it. The absinthe is clear, not bright green, and has a strong mint flavor rather than anise, though the black-licoriceness of the anise is still present. It was quite tasty...for absinthe.

Photobucket
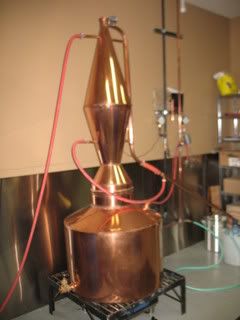
The Copper Still

Jesse said that The Stable will have one beer from each St. Louis brewery on tap at first. Their own brew will be available later this year. At first they will be serving a Helles-style beer with Marzen to follow (both are pale lagers). They will also have 16 taps to be filled with Belgian and "big bad American microbrews."

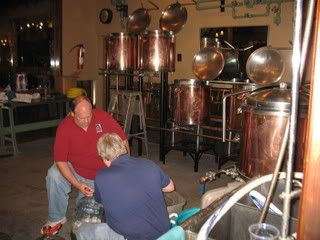
The brewing and distilling equipment are housed behind windows, so that patrons can see the gorgeous copper tanks and still. You can also get a glimpse of the coffee roaster that Mississippi Mud uses.

The menu features hand-made pizzas as well as a variety of starters, grinders & burgers, nightly dinner specials (including osso bucco and leg of lamb), and desserts. The menu is heavily Italian/Mediterranean influenced with dishes like polenta, Charcuterie, a house salad with white beans & salami, a white anchovy pizza, and ricotta cheesecake.

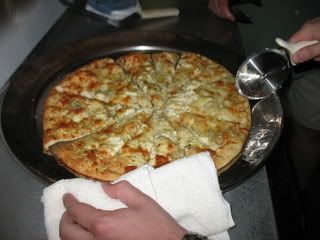
Executive chef Aaron Whalen (formerly of Bastante) was making pizzas on Saturday, and MAN WERE THEY GOOD! I am not just saying that because I know the owners. These pizzas were damned tasty! The crust, Aaron's own recipe, is hand-rolled and topped with a variety of creative ingredients. I tried the four-cheese pie (the Fromaggio) and was really impressed by how good it was. I found out later that the "secret" ingredient is...white truffle oil. Yum.

Photobucket
All pizzas are 16" thin-crust pies.

The other pizzas on the menu sound pretty yummy as well...especially the
Muffaletta (olive spread, capicolla, mortadella, proscuitto, and cheese), the Potato Pie (catsup, mayo, mustard, ground beef, onions, cheddar and American cheese), & the Pepperonata (rosemary and olive oil marinated red peppers with capers and goat cheese).

The Stable will celebrate its grand opening on June 21, but look for the doors to be open for business sometime next week. Until then, here are a few more pics I took last weekend:

Photobucket
Making beer in the Brew House

Photobucket
Take a look up at the huge chandelier over the bar to see a signature Jones touch.

Photobucket
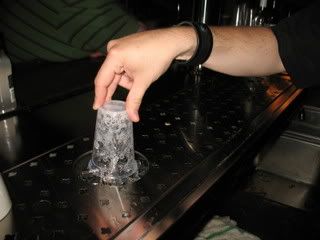
The bar features cool glass washers underneath the tap handles.

May 22, 2008

Taste & Create: Corn & Chorizo Tart


For this month's Taste & Create event, I was paired with Chronicles in Culinary Curiosity. After browsing that blog, I decided to make the Corn & Chorizo Tart with Chipotle Cream, which she adapted from a Cooking Light recipe.

I thought this would be a tasty supper to go along with margaritas...and I was right! This dish is made up of a layer of corn-studded polenta topped spicy mixture of corn, peppers, & chorizo and finished with a sprinkling of cheddar cheese. It's baked until hot and melting. The tart and spicy chipotle-lime sour cream is a nice compliment to the casserole.

Corn & Chorizo Tart

For the cream:
8 oz. sour cream
2 teaspoons fresh lime juice
3 minced chipotle chiles, canned in adobo sauce

For the tart:
1 chopped onion
1 large jalepeno chili, seeded & chopped
14 ounces chorizo
3 1/2
cups corn kernels
3 garlic cloves, minced
2 cups water
1/2 teaspoon salt
3/4 cup dry polenta
1/2 cup (2 ounces) shredded cheddar cheese, divided

To prepare the cream, combine the first 3 ingredients in a bowl, stirring well. Cover and chill.

Preheat oven to 400°.

To prepare the tart, heat a large skillet over medium-high heat. Saute onion, garlic, chili in olive oil for about 5 minutes. Remove casings from sausage. Add sausage to pan, stirring to crumble & cook about 5 minutes. Add corn and sauté until lightly browned. Turn off heat and set aside.

Combine 2 cups water and salt in a saucepan over medium-high heat; bring to a boil. Gradually stir in the polenta; cook 5 minutes or until thick, stirring constantly. Remove from heat, and stir in 1 1/2 cups corn mixture. Pour polenta mixture into prepared pan (a casserole dish coated with cooking spray). Sprinkle 1/4 cup cheese evenly over polenta mixture; top with remaining corn mixture. Sprinkle remaining 1/4 cup cheese over top.

Bake at 400° for 25 minutes or until lightly browned. Let stand for 5 minutes. Serve with chipotle cream.

Tuesdays (or Thursdays) with Dorie: Madeleines

Please forgive my tardiness with this week's entry. I baked the madeleines on Tuesday evening after dinner with friends, but haven't had time to sit down and blog about it.

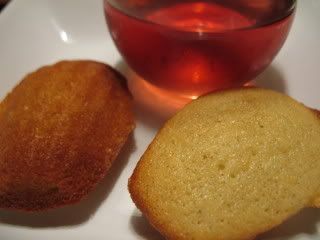
Mmmm....madeleines....freshly baked vanilla & lemon cakes, still a bit warm from the oven, are delicious with a glass of chilled French rose wine.

Photobucket

I was so excited about this making this recipe. You see, I had already decided that when it was my turn to choose a recipe, that I would pick madeleines. I'd been wanting to make them for a while, and I was thrilled that I had an excuse to do so...and to buy that adorable pan!

Overall, I was surprised at how easy this recipe is. Just mix the batter, let it chill a few hours (or overnight), then fill the molds & bake! The recipe makes 12 little cakes, the number of molds in the pan. So, you don't have tons of dessert (or extra batter) left over to pawn off on everyone you know. They are, as Dorie mentions at the end of the recipe, best eaten soon after they are baked. However, they aren't too shabby the next day dunked into a cup of hot Earl Grey.

Traditional Madeleines

from Dorie Greenspan's Baking: From My Home to Yours

Traditional Madeleines Madeleines are among the most recognizable pastries in the French repertoire because of their look: they are made in scallop-shaped molds from which they emerge ridged on one side, plump and full-bellied on the other and golden. That they are among the best known is thanks to Marcel Proust, who immortalized them in his novel Remembrance of Things Past. Everyone seems to know the story of Proust's narrator dipping the cookie into his tea and having the first taste bring back a flood of childhood memories. With that short entry, Proust and the madeleine gained such celebrity that even people who've never tasted the cookie refer to it with confidence as a touchstone. Yet when you take away all the literary allusions and all the romance, what you're left with is a tea cake that deserves to be famous for its deliciousness alone.

The madeleine is a beautiful, if somewhat plain, cookie made from the kind of batter you'd use for a sponge cake. What distinguishes it is its lightness; its texture—the tiny-bubbled crumb is très raffiné; and its flavor, a delicate mix of lemon, vanilla and butter.

This recipe is for a classic madeleine like the one I learned to make in Paris—it's the kind that would make Proust happy. But there are other kinds of madeleines, madeleines Proust might not approve of but that would please most everyone else. When you're ready for a different take on the classic, try Mini Madeleines, Earl Grey Madeleines and the far-from-traditional Fluff-Filled Chocolate Madeleines. I don't even want to imagine what Proust would think of those!

Just to set the record straight, while it's Proust who gets all the credit for making madeleines a household name, the honor really belongs to King Stanislas Leszczynski of Poland, who, in the eighteenth century, tasted a tea cake made by a local woman in Commercy, France. He was so delighted with the cookie that he named it after the baker, Madeleine.

2/3 cup all-purpose flour
¾ teaspoon baking powder
Pinch of salt
½ cup sugar
Grated zest of 1 lemon
2 large eggs, at room temperature
2 teaspoons pure vanilla extract
¾ stick (6 tablespoons) unsalted butter, melted and cooled
Confectioners' sugar, for dusting

Whisk together the flour, baking powder and salt.

Working in a mixer bowl, or in a large bowl, rub the sugar and lemon zest together with your fingertips until the sugar is moist and fragrant. Add the eggs to the bowl. Working with the whisk attachment, or with a hand mixer, beat the eggs and sugar together on medium-high speed until pale, thick and light, 2 to 3 minutes. Beat in the vanilla.
Photobucket
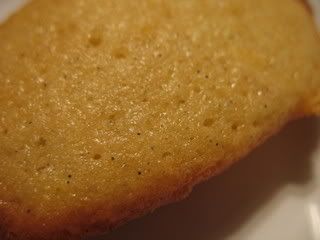
I used vanilla paste, and I like how you can see the specks of vanilla.

With a rubber spatula, very gently fold in the dry ingredients, followed by the melted butter. Press a piece of plastic wrap against the surface of the batter and refrigerate it for at least 3 hours, or for up to 2 days. This long chill period will help the batter form the hump that is characteristic of madeleines. (For convenience, you can spoon the batter into the madeleine molds, cover and refrigerate, then bake the cookies directly from the fridge; see below for instructions on prepping the pans.)

GETTING READY TO BAKE: Center a rack in the oven and preheat the oven to 400 degrees F. Butter 12 full-size madeleine molds, or up to 36 mini madeleine molds, dust the insides with flour and tap out the excess. Or, if you have a nonstick pan (or pans), give it a light coating of vegetable cooking spray. If you have a silicone pan, no prep is needed. Place the pan(s) on a baking sheet.
Photobucket
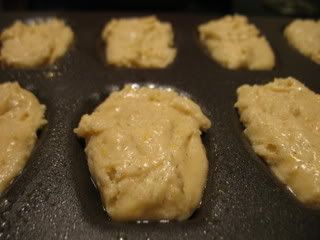
I might have over-filled the molds a bit, but I was trying to use all the batter.

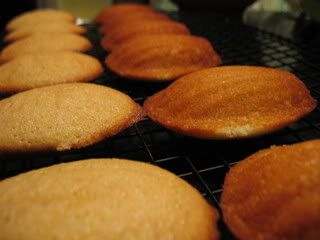
Spoon the batter into the molds, filling each one almost to the top. Don't worry about spreading the batter evenly, the oven's heat will take care of that. Bake large madeleines for 11 to 13 minutes, and minis for 8 to 10 minutes, or until they are golden and the tops spring back when touched. Remove the pan(s) from the oven and release the madeleines from the molds by rapping the edge of the pan against the counter. Gently pry any recalcitrant madeleines from the pan using your fingers or a butter knife. Transfer the cookies to a rack to cool to just warm or to room temperature.
Photobucket

If you are making minis and have more batter, bake the next batch(es), making certain that you cool, then properly prepare the pan(s) before baking.

Just before serving, dust the madeleines with confectioners' sugar.

makes 12 large or 36 mini cookies

Serving: Serve the cookies when they are only slightly warm or when they reach room temperature, with tea or espresso.

Storing: Although the batter can be kept in the refrigerator for up to 2 days, the madeleines should be eaten soon after they are made. You can keep them overnight in a sealed container, but they really are better on day 1. If you must store them, wrap them airtight and freeze them; they'll keep for up to 2 months.
May 18, 2008

Fava Bean Crostini

Photobucket

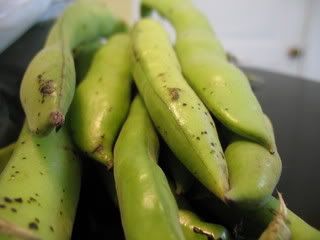
Cooking fava beans is a somewhat tedious process, but it's worth it.

Photobucket

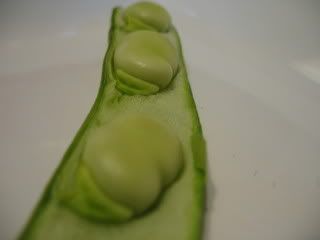
There are about 3 or 4 beans per pod.

Photobucket

First, you have to get the beans out of the pods. It's easiest by snapping the end off and and splitting the pod down the seam. If that doesn't work, just squeeze the beans from the pods.

Photobucket

Once you have extracted all the beans, you have to boil them for 2-3 minutes. Then, plunge them into a bowl of ice water. Now, you have to pop the bean out of its waxy skin by gently squeezing it between your thumb and forefinger.

Photobucket
Fava carcasses.

Photobucket
Fava beans ready to eat!

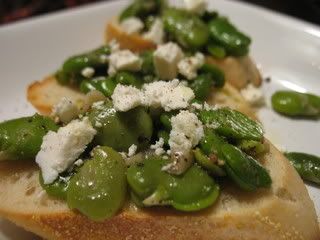
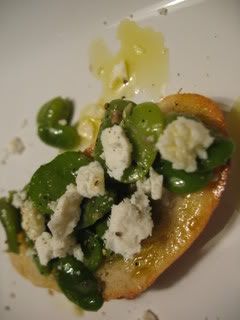
At this point, you can add the beans to pastas, soups, salads, or...as I did...sauteed with thinly slices ramps (or garlic) and eaten on top of toasted baguette slices with ricotta salata cheese (or parmesan), sea salt, cracked black pepper, and a drizzle of olive oil

Photobucket

Fava bean crostini makes a wonderfully light spring dinner to enjoy with a glass of dry red wine.

Photobucket

May 16, 2008

Friday Favorites V: Chocolate Edition

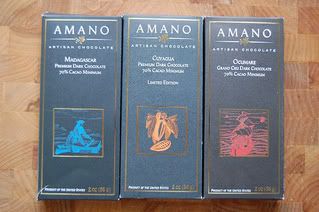
I recently received free chocolate from another Blake Makes giveaway. This one was for three bars of Amano Artizan Chocolate.

To win, we had to leave a comment explaining how much we love dark chocolate. I wrote, "According to Italian researchers, women who eat chocolate regularly have a better sex life than those who deny themselves the treat. Those consuming the sugary snack had the highest levels of desire, arousal, and satisfaction from sex. Please send me the chocolate. My sex life depends on it."

Amano was started by Art Pollard in 1996. The story, according to Amano's website site, is that while on his honeymoon, Pollard "decided that there had to be better chocolate than what was being produced in the United States or that of numerous imported varieties. Thus began his search for the 'ultimate chocolate,' which is not bland or flat, but has superior flavor and texture." After much research and experimentation, Pollard's chocolate started getting rave reviews from local chefs. Art's business partner, Clark Goble, suggested Art make his chocolate available commercially. After studying chocolate making in Europe and traveling throughout Mexico, Art felt his chocolate was comparible to the very best European chocolate and was ready to produce commercially. Since 2006, Amano chocolate has won numerous awards.

When the chocolate was shipped to me, I received an email from Art Pollard. He wrote, "Each and every day, we wake up in the morning with the singular goal of making the very best chocolate. Sometimes it involves my flying out to the country of origin to meet with the farmers who supply our cocoa beans. Sometimes it means modifying our equipment to get our machines to do what we want. And most importantly, some days it involves our staying at the factory late into the night to make sure that our chocolate turns out "just-right." We hope you enjoy our chocolate; it means the world to us."

While Amano uses machinery to produce their chocolate, Art says that their "special process still requires a huge amount of labor." They are one of only a few American chocolate makers that obtains superior quality cocoa beans direct from the source.

I was lucky to try three of their small batch chocolate, single-origin, 70% cocoa chocolate bars: Ocumare Grand Cru Dark Chocolate, Madagascar Preminum Dark Chocolate, and Cuyagua Limited Edition Dark Chocolate.

Photobucket
picture from Blake Makes

My favorite was the Madagascar. The description notes that it has a "strong, fruity flavor" that includes "hints of citrus and berry." And, OH MY GOD, I could really taste the fruitiness. It was as if there were raspberries in it! So good!

My friends also liked the Cuyagua, which is richer in chocolate flavor.

They were all really good, though, and it was interesting to taste these three chocolates together. It enabled us to see how very different chocolates, like wines, can be.

Anyway, I am excited about getting to play around with this chocolate. Check back in the next couple weeks to see what I am going to do with it....

May 14, 2008

The Last of the Morels

Photobucket
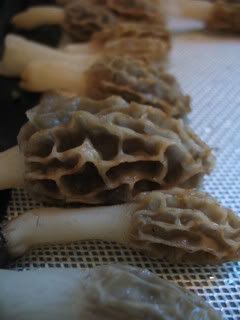
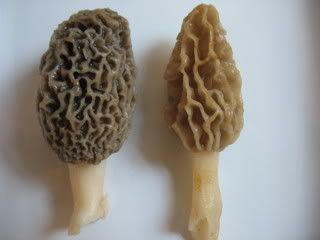
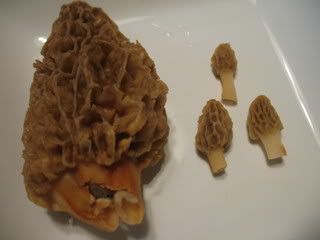
I got another (and the last) bag of morel mushrooms from the hunter/gatherer about a week ago.

Photobucket
These were grays and yellows.

Photobucket
There were really BIG shrooms and teeny-tiny shrooms.

Photobucket
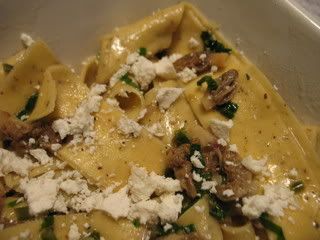
I first made an impromptu pasta with a sauce of morels, ramps, and ricotta salata cheese. I ate it over black pepper parpadelle noodles, which were actually too hearty for the delicate sauce.

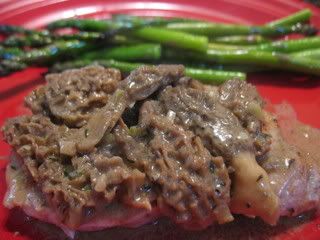
Then, I saw a picture of veal chops with a morel mushroom sauce on Sunday Nite Dinner and decided to make that for dinner the next day.

Photobucket
I adapted the recipe slightly and ate it over porkchops with fresh asparagus.

Morel & Coconut Cream Cognac Sauce

Ingredients:
  • 6 tablespoons of canola oil
  • 1 pound morel mushrooms, cleaned, halved if large
  • 3 tablespoons ramps, diced
  • 1 tablespoon fresh thyme leaves
  • 1/2 cup Cognac
  • 1 tablespoon Dijon mustard
  • 3-4 tablespoons unsweetened coconut cream
  • Kosher salt and freshly ground pepper to taste
Directions:
  1. Heat 2 tablespoons oil in a large ovenproof sauté pan over medium-high heat. Add the morels and sauté until they are tender and give up their liquid, about 5 minutes. Add the ramps and thyme and sauté until softened, about 3 minutes. Transfer to bowl and set aside.
  2. Preheat oven to 400°F. Generously season chops with salt and pepper on both sides. Heat 2 tablespoons oil in the pan over high heat. Add chops to pan and sear until golden brown on both sides, about 3-4 minutes per side. Place the pans into the oven to finish cooking, about 5-6 minutes, or until desired doneness. Transfer the chops to a plate.
  3. Deglaze the pan with Cognac, scraping up any browned bits on the bottom of the pan. Add Dijon mustard and stir to incorporate. Add the coconut cream, sauteed mushrooms, and any juices from the resting chops and bring to a boil. Adjust seasonings to taste. To serve, place one chop on each plate and spoon the morels on top.

May 13, 2008

(I wish I was in) Florida . . . Pie

After the basement flooding drama this weekend, I've been thinking a lot about memories. I can't continue to dwell on the fact that all those photographs are gone. I have to, instead, try to remember all those vacations, parties, weddings, gatherings, births, etc. Memories...they're all I have now of that period in my life.
It wasn't just the loss of the pictures that bothers me. There was also my teddy bear, the one my aunt gave to me when I was born. He'll need to have his stuffing replaced, I'm sure, since he's soaked through and through.

Photobucket

I figured that most of the dishes--my parents' wedding china & my unusual tea cup collection--would be fine, would just need a good washing. However, the guys hired to work on cleaning the basement must have just thrown stuff into trash bags...a few tea cups were broken, including part of the miniature tea set I played with as a child.

Photobucket

Then again, I've always believed that there has to be destruction in order for there to be rebirth, renewal, and change. I've even written about that before, and that post seems eerily relevant now.

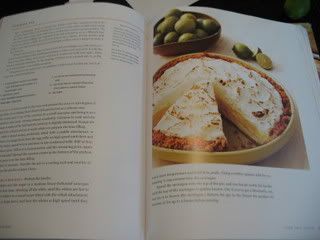
So, what does all that have to do with pie? Initially, I wondered why this week's Tuesdays with Dorie recipe (chosen by Dianne of Dianne's Dishes) was called "Florida Pie." Then, I read Dorie's explanation; this pie reminds her of vacationing in Florida with her family.

My family, too, used to vacation in Florida...Sanibel Island to be exact. I remember going there, but I don't have too many specific memories of what we did. I do remember once being at a shop where I picked an oyster out of a tank, and they opened it up to find a pearl, which I then had set into the jewelry of my choice. I chose a little silver cage pendant that held the pearl. I've often wondered what happened to that necklace. Our other vacations, the ones I had albums of pictures from, included a cross-country drive to California (four people, including one little brother, in a minivan...ugh) with a stop in Arizona (look, kids, it's the Grand Canyon!), a weekend in Chicago, and a week spent at my uncle's farm in West Virginia.

Anyway...at least here is another dessert to distract and comfort me while I continue to sort through bags of mementos and memories of a past life.

Florida Pie
from Dorie Greenspan's
Baking: From My Home to Yours

Photobucket

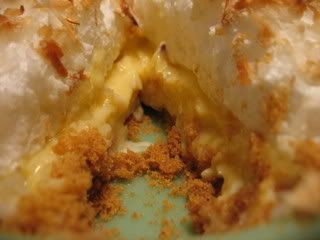
Dorie says, "What I did was put a layer of sweet (but not exceedingly so), soft, chewy coconut in the bottom of the traditional graham cracker crust and cover it with the classic Key lime filling [...]. Then when I made the meringue for the topping, I folded some coconut into it, so the pie is symmetrical--coconuttily speaking."

Photobucket
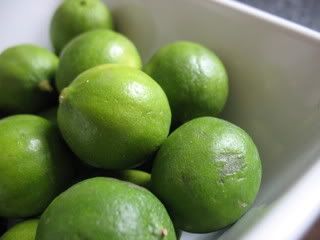
Squeezing Key limes made me feel like a giant.

1 9-inch graham cracker crust, fully baked and cooled, or a store-bought crust
1 1/3 cups heavy cream
1 1/2 cups shredded sweetened coconut
4 large eggs, separated
1 14-ounce can sweetened condensed milk
1/2 cup fresh Key (or regular) lime juice (from about 5 regular limes)
1/4 cup of sugar

Getting Ready:

Center a rack in the oven and preheat the oven to 350 degrees F. Put the pie plate on a baking sheet lined with parchment of a silicone mat.

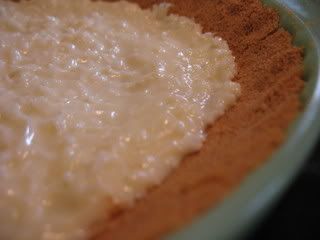
Put the cream and 1 cup of the coconut in a small saucepan and bring it to a boil over medium-low heat, stirring almost constantly. Continue to cook and stir until the cream is reduced by half and the mixture is slightly thickened. Scrape the coconut cream into a bowl and set it aside while you prepare the lime filling.

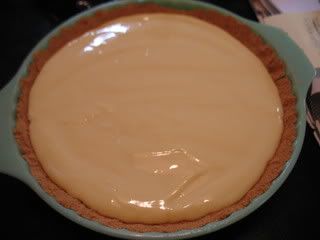
Working with a stand mixer, preferably fitted with a paddle attachment, or with a hand mixer in a large bowl beat the egg yolks at high speed until thick and pale. Reduce the mixer speed to low and beat in the condensed milk. Still on low, add half of the lime juice. When it is incorporated, add the reaming juice, again mixing until it is blended.

Photobucket

Spread the coconut cream in the bottom of the graham cracker crust, and pour over the lime filling.

Bake the pie for 12 minutes. Transfer the pie to a cooling rack and cool for 15 minutes, then freeze the pie for at least 1 hour.

Photobucket

To Finish the Pie with Meringue:

Put the 4 egg whites and the sugar in a medium heavy-bottomed saucepan and heat over medium-low heat, whisking all the while, until the whites are hot to the touch. Transfer the whites to a stand mixer, fitted with the whisk attachment, or use a hand mixer in a large bowl, and beat the whites at high speed until they reach room temperature and hold firm peaks. Using a rubber spatula, fold the remaining 1/2 cup coconut into the meringue.

Spread the meringue over the top of the pie, and run the pie under the broiler until the top of the meringue is golden brown. (Or, if you've got a blowtorch, you can use it to brown the meringue.) Return the pie to the freezer for another 30 minutes or for up to 3 hours before serving.

Photobucket

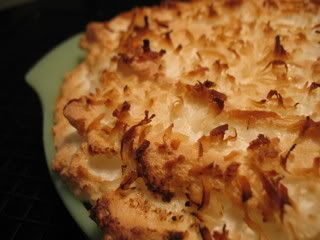
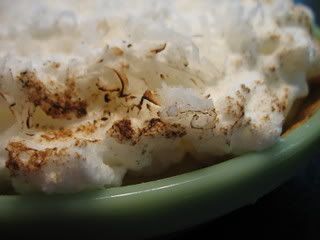
Kelly's note: I didn't do any of the freezing. I just let the baked pie cool enough to top it with meringue. I sprinkled that with some coconut instead of folding it in. Then, I tried used my brulee torch to brown the top. It was burning too much, though, instead of browning.

Photobucket

So, I stuck the pie back in the oven for a few minutes until the top was nice and toasty. My first meringue pie...I'm so happy with how it turned out!

Photobucket

May 11, 2008

What Momma Used to Make

For my mother,
Linda Kay Green
1948-1996

I’ve mentioned before that my mom wasn’t the greatest cook. It’s not that she didn’t cook; it’s just that my dad is a picky eater, so she usually only cooked what he liked. I can count the different meals we ate on both hands: spaghetti, fried potatoes & kielbasa, chili, pot roast, beef stew, pork chops, ham & beans, hamburgers, hot dogs (boiled until we got a microwave, then placed in a bun, rolled in a paper towel, & zapped). Vegetables were always canned, usually peas or corn (creamed corn most of the time). We ate a lot of t.v. dinners, too, because Dad liked them. My favorites were salisbury steak or enchiladas with those little squares of dessert (brownies or cherry pie filling) that got so hot they destroyed your tongue.

One of her most famous family meals we called “Linda’s Goulash,” a whatever-she-could-find-in-the-kitchen casserole...usually made with hamburger that was almost gone-bad, canned tomatoes, & instant rice.

When I think of Mom’s cooking, I think of those recipes you’d find in a school or church fundraiser cookbook: broccoli rice casserole (made with a jar of Cheez Whiz) and creamed beef on toast (which I still crave).

Sometimes, Mom made dishes just for the two of us...since we were the more adventurous eaters in the family. She’d make veggie beef soup, tempura and sweet & sour chicken in her electric wok, or a big pot of freshly picked green beans with ham & potatoes (she’d have to make a separate pot of “creamed” green beans for dad, he who also ate mayonnaise sandwiches and drank buttermilk).

Her lack of cooking was infamous among our family and friends. In fact, we always joked about how she’d won the Betty Crocker award in high school. The punch line? It was a written test. Once, at a wedding shower we were asked to bring our favorite recipes to share with the bride. Mom brought a recipe for margaritas, and no one was at all surprised.

Her best foods were usually snack foods like dried beef & green onion cheese ball, French onion dip for chips, or her infamous taco dip (cream cheese, sour cream, package of taco seasoning, and shredded cheese microwaved until molten)....which we've since named "White Trash Taco Dip."

However, my favorite was her tacos...flour tortillas filled with beef & beans then deep fried. I remember, when I was little, driving to another town to buy freshly made tortillas from a Mexican lady. This was before you could them in a grocery store.

On taco nights, Mom would make a big skillet of the filling by simply browning some ground beef then adding cans of refried beans & a package of taco seasoning. I’d sneak spoonfuls of it when no one was looking.

If we were lucky, before she fried up some of the tacos, she’d cut several tortillas into small, chip-sized wedges, fry them in some oil, then set them on the table with a bowl of salsa.

For the tacos, she’d place some of the filling in the middle of a tortilla and fold it over. Then, she’d fry them in a shallow skillet, with just enough hot oil to cover the bottom of the pan, until they were puffed and golden brown on one side. Then, she’d turn them with a pair of tongs and brown the other side. They were served, of course, with all the fixin’s...cheese, lettuce, tomato, sour cream, & salsa.

Growing up, I thought everyone ate tacos like that. When I was invited to a friend’s house for dinner one night, I was disappointed by the packaged corn shells that broke easily and by the bean-less filling made of crumbly ground beef.

About once a year, I make a point to fry up a batch of Mom’s tacos. It’s usually a festive dinner...complete with many margaritas and friends...a stand-around-in-the-kitchen and eat kind of meal.

In case you’ve gotten the wrong impression, let me clarify. Mom wasn’t anti-cooking, nor was she a boozer (though, she did partake in a bourbon & coke from time to time). She was an intellectual (held a master’s degree and kicked everyone’s ass at Trivial Pursuit). She was a professional (high school teacher/assistant principal). She read a lot. She was strong-willed. She was caring and helpful. She was hilariously funny.

I didn’t realize it then, but she was the “cool” mom (as my friends have since told me)...the cool mom who let me eat shrimp cocktail and nachos for dinner with little bottles of Pepsi.

May 10, 2008

Dessert for the Broken-Hearted

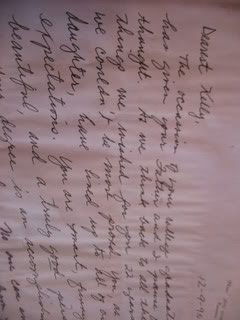
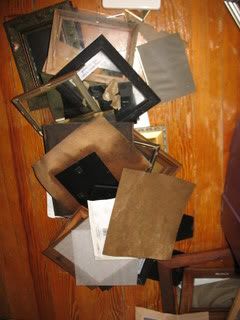
A broken sump pump. Over a foot of water in the basement. Everything ruined. Furniture. Decorations. Speaker system. Boxes in storage . . . full of videos. CDs. Important documents. Mom's china. Tea cup collection. Family heirlooms. Childhood mementos. Wedding dress. Greeting cards. Letters.

Photobucket

Photobucket

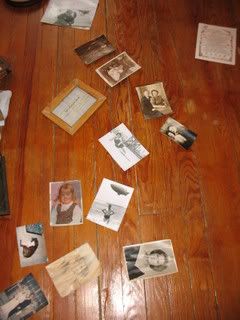
And photograph albums. All the photographs. So many photographs . . . Weddings. Vacations. Births. Parties. Holidays. Family. Friends. All smeared into a sticky, stinking, wet mess.

Photobucket

Photobucket

Sloshing barefoot through cold water, I nearly slipped on the slimy concrete floor. Mold has begun to take over. Cardboard disintegrated on contact. Paint cans and plastic Halloween pumpkins floated.

No one noticed the flooding. Not for weeks. No one went downstairs.

I spent the afternoon sorting through nearly every picture I've taken since high school. Most of them ended up in a trash bag, unsalvageable. My hands were stained with ink, which was sliding off the paper at my touch.

Photobucket

Maybe it's fitting that all the photographic evidence of the past 15 years of my life has been destroyed. A sign? I don't know. I can't bear to think about it.

Nevertheless, my heart is broken. In more ways than one.
So, I'm self-medicating tonight with . . .

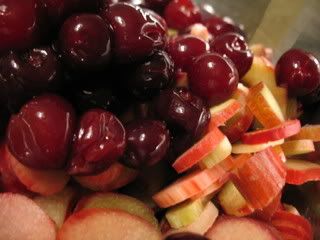
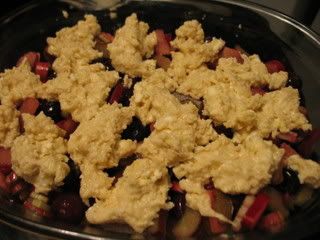
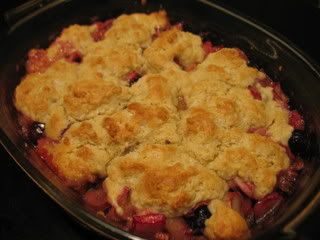
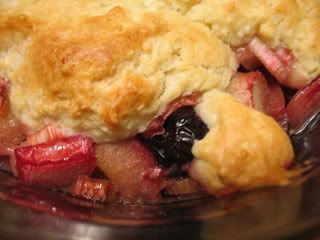
Cherry Rhubarb Cobbler

adapted from Simply Recipes

Filling:
4 cups rhubarb, stems sliced 1-inch thick
1 1/2 cups frozen black cherries, thawed
1/2 cup sugar

Crust:
2 tablespoons sugar
1 cup all-purpose flour
1 1/2 teaspoons baking powder
1/4 teaspoon salt
1/4 cup cold butter, diced
1/4 cup milk
1 egg, slightly beaten

Directions:
  • Preheat oven to 350.
  • In a bowl, mix rhubarb and cherries with sugar. Let sit for about 30 minutes.
Photobucket
  • In another bowl, combine 2 tablespoons of sugar, flour, baking powder, and salt. Cut in the butter until the mixture resembles coarse crumbs. Stir in the mild and egg until just moistened.
  • Pour fruit into a 2-quart baking dish. Drop batter by spoonfuls on top.
Photobucket
  • Bake for 30 minutes or until crust is golden brown.
Photobucket
  • Serve with freshly whipped cream.
Photobucket

The filling was a bit runny, watery. I thought that appropriate . . . considering.